This article will help you to setup the basic MVVM pattern in a Windows 10 Universal Platform App using MVVM Light Toolkit from Galasoft.
What is MVVM ?
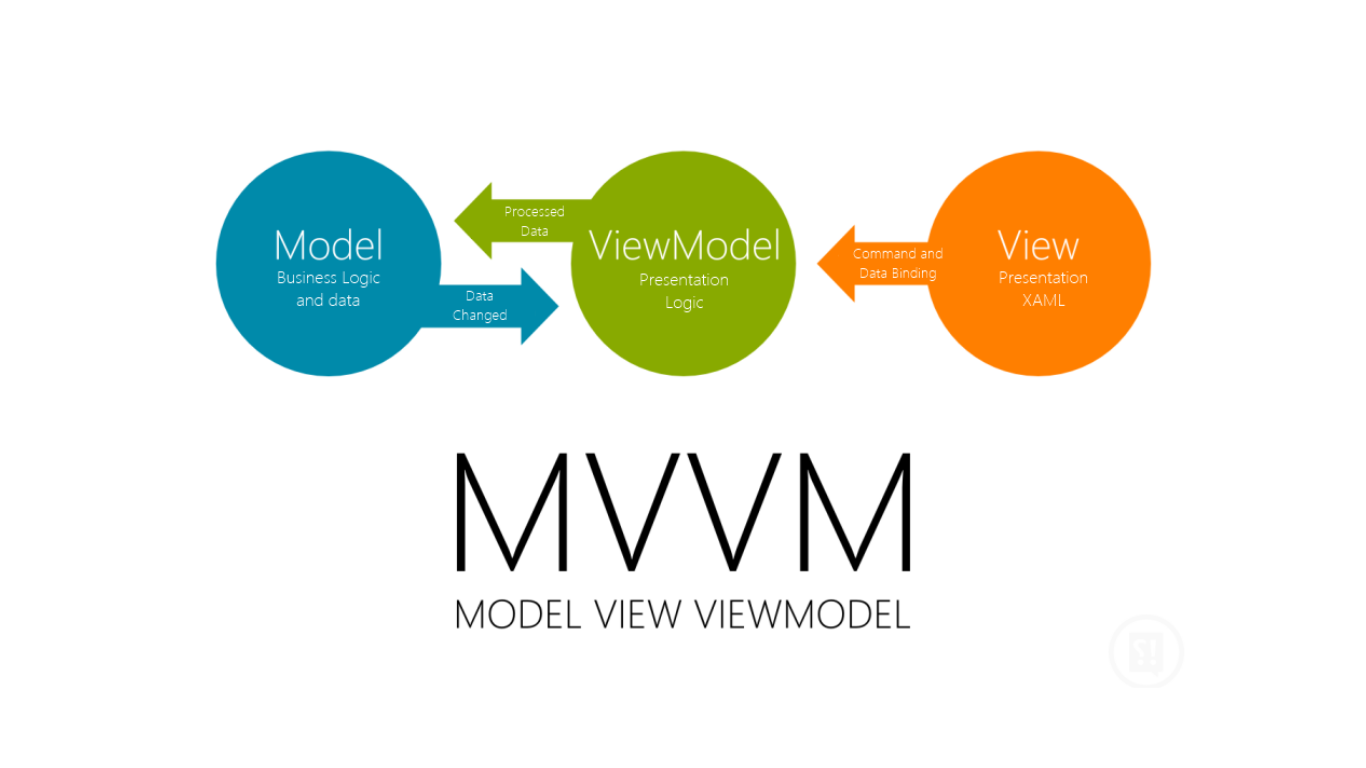
MVVM (Model-View-ViewModel) is and software architectural pattern which provide a clean separation of concerns between the user interface controls and their logic. There are three core components in the MVVM pattern: the model, the view and the View Model.Each serves a distinct and separate role.
A complete discussion of MVVM pattern is outside the scope of this article so if you are new to the concept and want to learn more I suggest taking a look at articles like this one on MSDN: The MVVM Pattern
MVVM Light Toolkit
The MVVM Light Toolkit is an open-source framework for building applications using the MVVM Pattern.The main purpose of the toolkit is to accelerate the creation and development of MVVM applications in WPF, Silverlight, Windows Store, Windows Phone and Xamarin
MVVM Light is a library that i use since its early versions. Many other implementations of the MVVM pattern are available, such as Prism, and some developers even choose to roll their own framework.
Getting Started
For starters let me be clear that you need Windows 10 Pro (to make use Hyper-v to run emulators) and Visual Studio 2015 as IDE. I suggest you install Visual Studio 2015 Community which is Free Which is Packed with almost all the Features you need for development.
Startup Visual Studio 2015 and create a New Project Template under Visual C# choose Windows then select Blank App (universal Windows ).
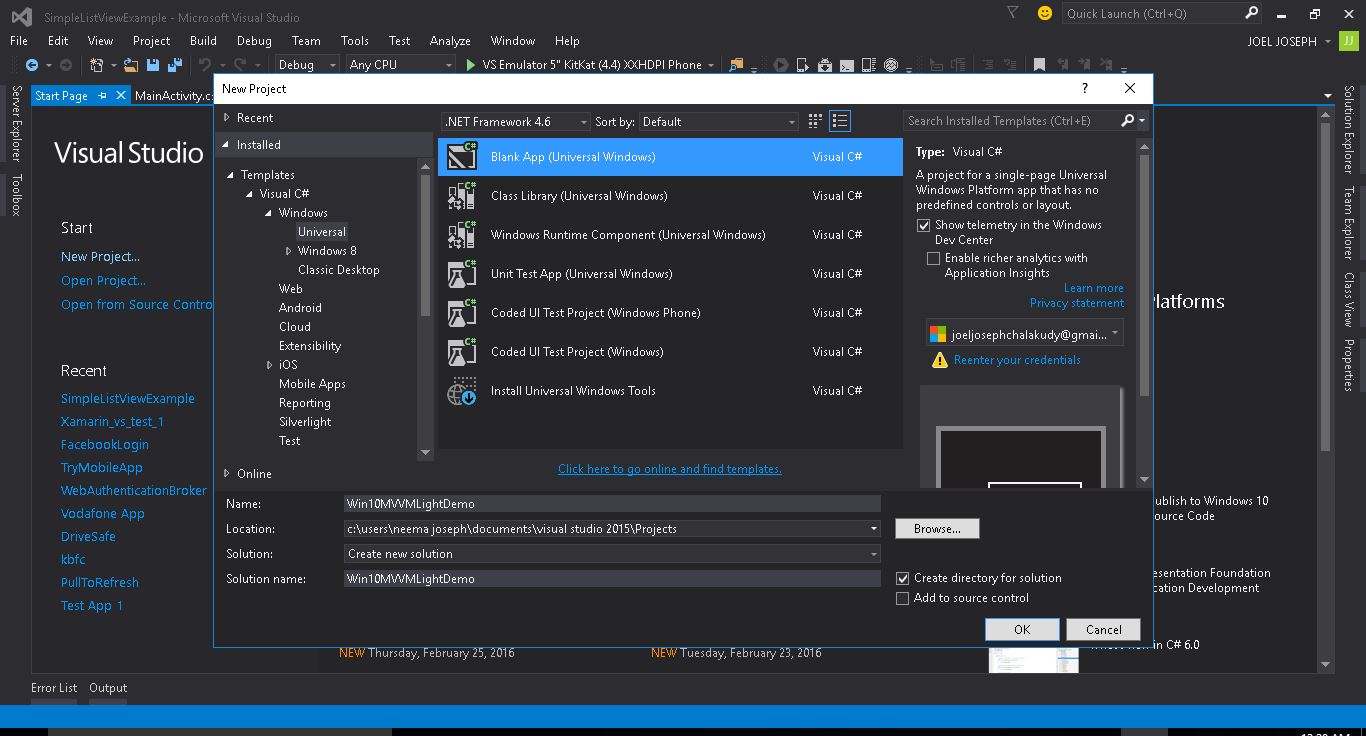
Just name your project something like Win10MVVMLightDemo. Visual Studio will create a new Solution with your project which will look something like this:
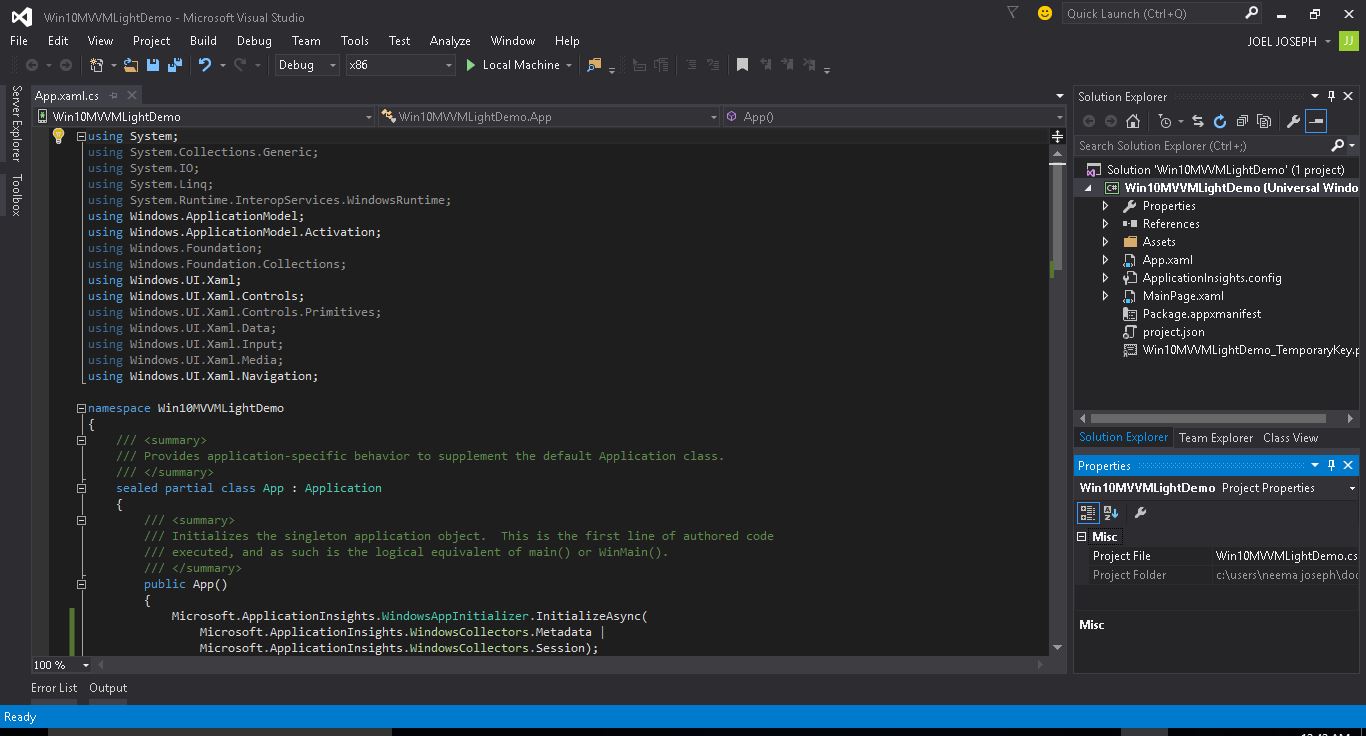
You can see the new project created and the default folder structure by looking the Solution Explorer
Installing MVVM Light Toolkit
There are different ways to install MVVM Light Toolkit , but in this demo use Nuget.
Before installing MVVM Light Toolkit through nuget i like to inform those who have used MVVM Light Toolkit for Windows 8 and Windows 8.1 (Phone or desktop) Development that Nuget team changed the implementation for UWP and decided not to support content files and the powershell script anymore. So the current version of MVVM Light Toolkit (5.2.0) Does not create ViewModelLocator for you, nothing will be added to resources and no code is added to App.xaml like it used to. You will have to add these manually.
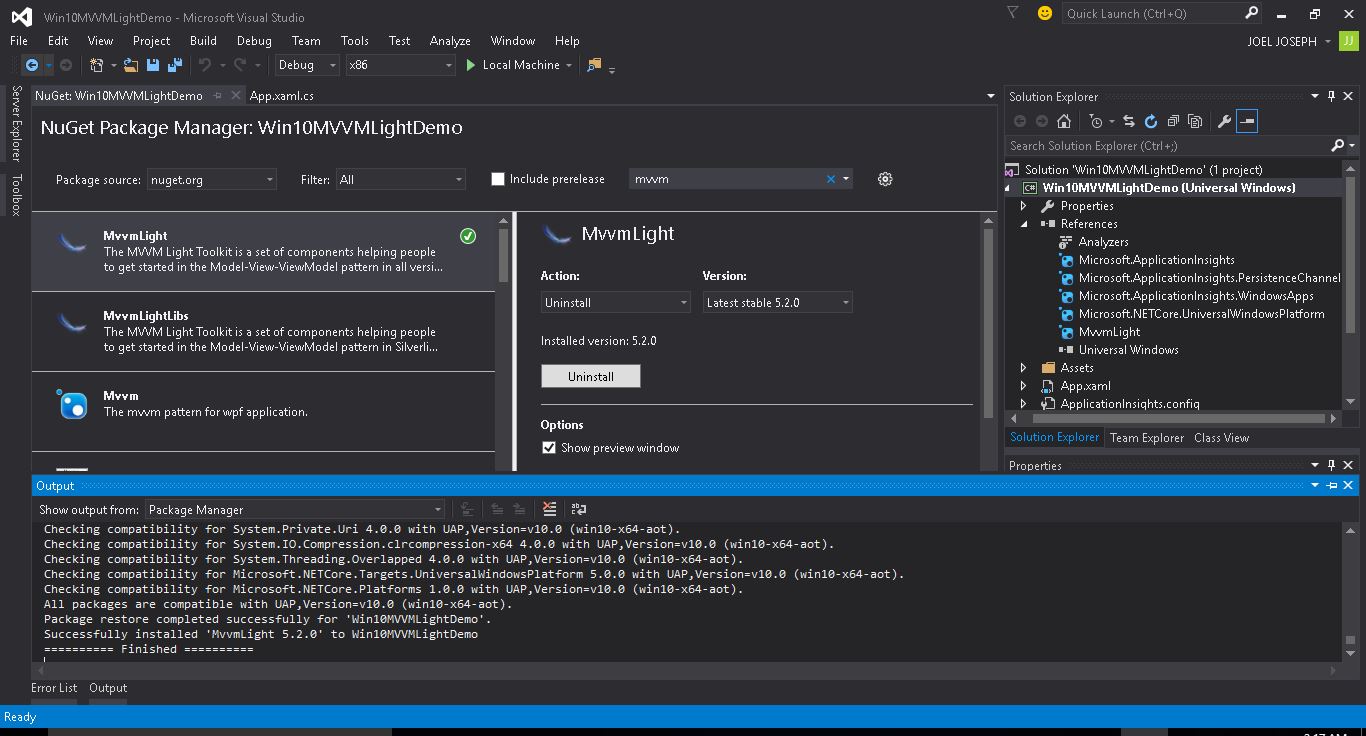
Right Click the project References in Solution Explorer and on the menu that appears click on Manage Nuget Packages. On the Windows that appears search with keyword 'mvvm light' :
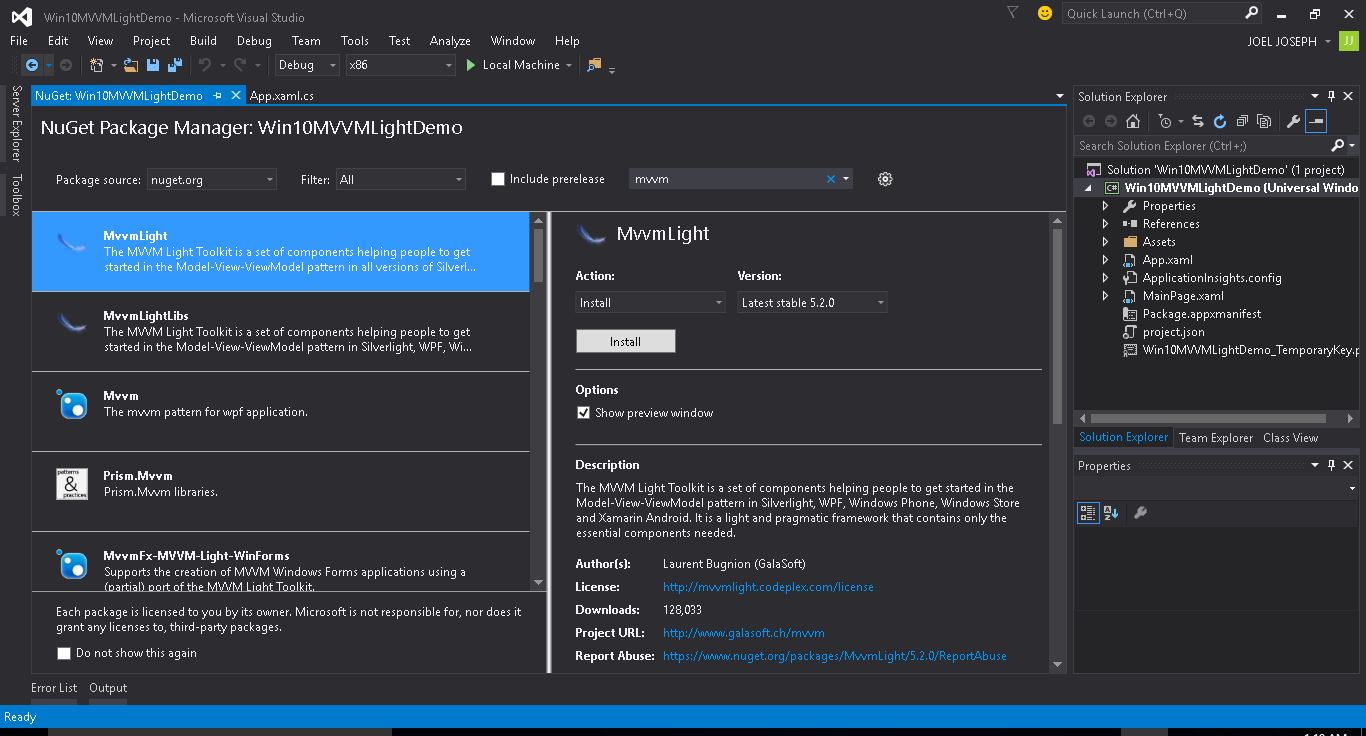
Now make sure you select the MVVM Light Toolkit From Galasoft and click install. This install the MVVM Light Library and its references to the project.While installing it may prompt you asking permission to install components just click 'I Accept' . After installation is complete you can see the reference added to the project under References in Solution Explorer:
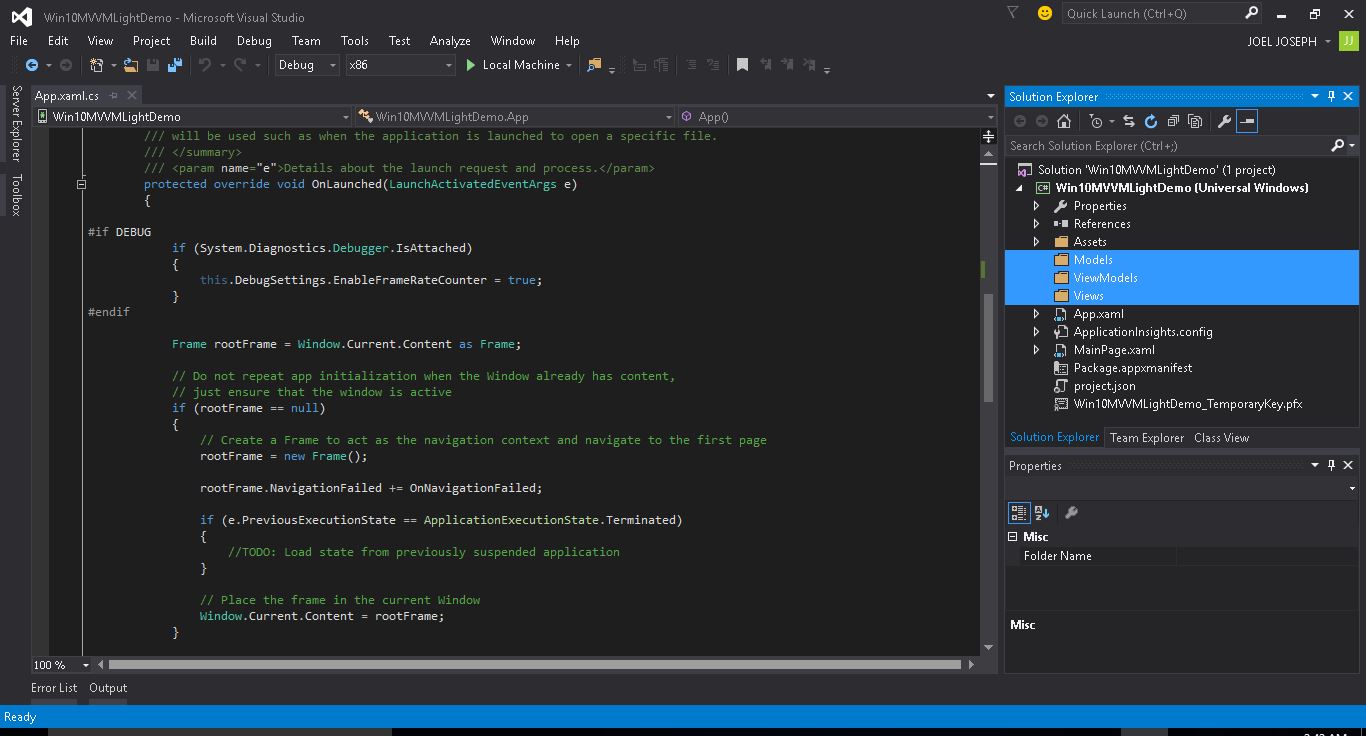
Now Lets Set up the Project Structure since Folders for Views and ViewModels are not added to project resources automatically as used to early in windows 8.1
Right Click on the project in Solution Explorer and Add three folders Models , Views , ViewModels.
You may delete or move the existing page MainPage.xaml to Views folder. For now lets delete it and add a new item StartPage.xaml in Views folder. Right Click on Views folder and add New Item and select Blank Page name it StartPage.xaml.
Now the new Blank Page will be created in Views folder, since we deleted the default Startup page MainPage.xaml you will now have to scope the App 's Startup Page to StartPage.xaml in Views folder. To do this look for App.xaml.cs and search for the word MainPage.
You will find following code under OnLaunched method:
rootFrame.Navigate(typeof(MainPage), e.Arguments);
Change it to:
rootFrame.Navigate(typeof(StartPage), e.Arguments);
Also you need to add the following dependency in App.xaml.cs
using Win10MVVMLightDemo.Views;
just press Ctrl + . on the word to bring out the intellisense.

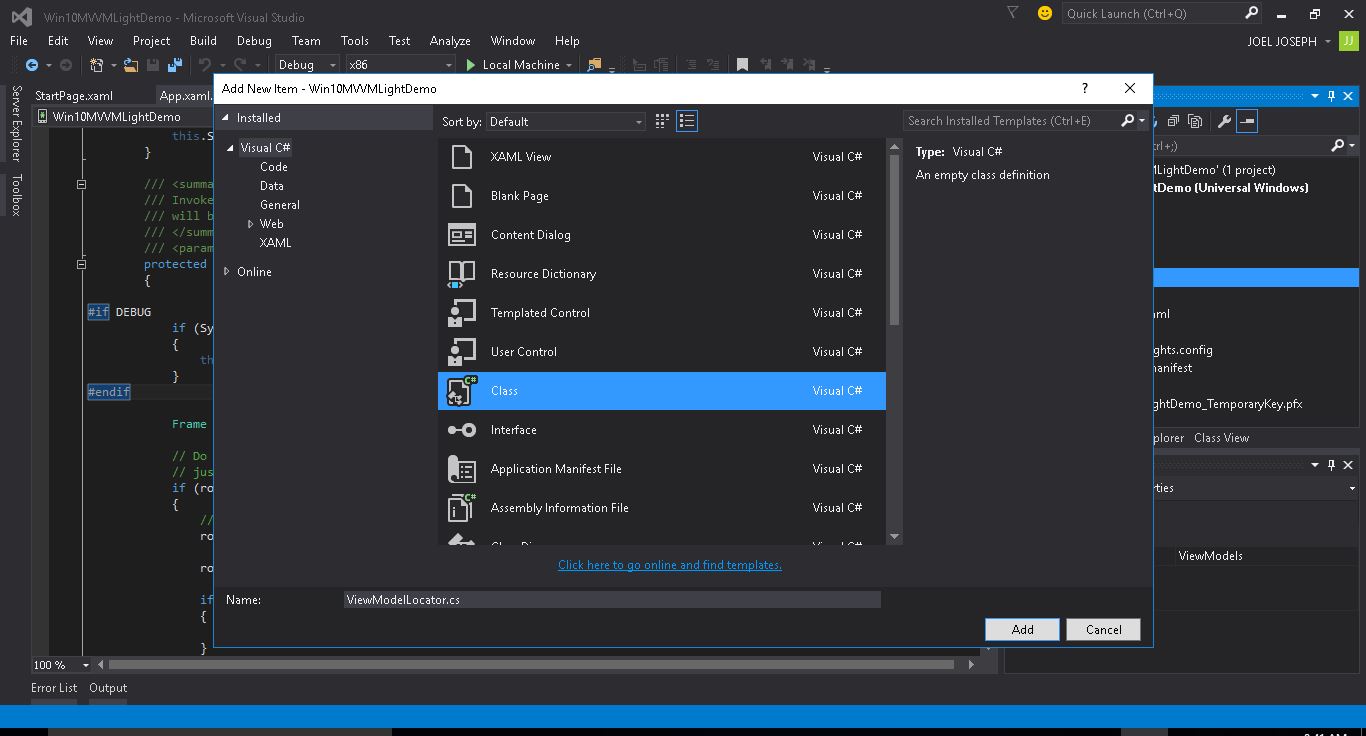
Next we have to Add a new Class ViewModelLocator.cs to the ViewModels folder.
A ViewModelLocator is a class that centralizes the definitions of all the ViewModels in an app so that they can be cached and retrieved on demand, usually via Dependency Injection. ViewModelLocator is an idiom that lets you keep the benefits of DI(Dependency Injection) in your MVVM application while also allowing your code to play well with visual designers. ViewModelLocator needs to setup the IOC provider, register each individual ViewModel, and finally expose those registered ViewModels for use by the rest of the application. A full discussion of these topics also outside the scope of this document, but it's discussed on StackOverflow .
Now replace the code in the ViewModelLocator.cs with the following code :
using GalaSoft.MvvmLight;
using GalaSoft.MvvmLight.Ioc;
using GalaSoft.MvvmLight.Views;
using Microsoft.Practices.ServiceLocation;
using System;
using System.Collections.Generic;
using System.Linq;
using System.Text;
using System.Threading.Tasks;

namespace Win10MVVMLightDemo.ViewModels
{
    /// <summary>
    /// This class contains static references to all the view models in the
    /// application and provides an entry point for the bindings.
    /// </summary>
    public class ViewModelLocator
    {
        /// <summary>
        /// Initializes a new instance of the ViewModelLocator class.
        /// </summary>
        public ViewModelLocator()
        {
            ServiceLocator.SetLocatorProvider(() => SimpleIoc.Default);
            if (ViewModelBase.IsInDesignModeStatic)
            {
                // Create design time view services and models
            }
            else
            {
                // Create run time view services and models
            }

            //Register your services used here
            SimpleIoc.Default.Register<INavigationService, NavigationService>();
            SimpleIoc.Default.Register<StartPageViewModel>();

        }


        // <summary>
        // Gets the StartPage view model.
        // </summary>
        // <value>
        // The StartPage view model.
        // </value>
        public StartPageViewModel StartPageInstance
        {
            get
            {
                return ServiceLocator.Current.GetInstance<StartPageViewModel>();
            }
        }

        // <summary>
        // The cleanup.
        // </summary>
        public static void Cleanup()
        {
            // TODO Clear the ViewModels
        }
    }

}
Now we will add another Class in ViewModles folder StartPageViewModel.cs and replace the code inside with the following:
using GalaSoft.MvvmLight;

namespace Win10MVVMLightDemo.ViewModels
{
    public class StartPageViewModel : ViewModelBase
    {
        private bool _isLoading = false;
        public bool IsLoading
        {
            get
            {
                return _isLoading;
            }
            set
            {
                _isLoading = value;
                RaisePropertyChanged("IsLoading");

            }
        }
        private string _title;
        public string Title
        {

            get
            {
                return _title;
            }
            set
            {
                if (value != _title)
                {
                    _title = value;
                    RaisePropertyChanged("Title");
                }
            }
        }

        public StartPageViewModel()
        {
            Title = "Hello Joel";
        }
    }
}
The ServiceLocator is responsible for retrieving the ViewModel instances, using the SimpleIoc.Default implementation provided by MVVM Light. By registering them via the SimpleIoc.Default instance in the constructor, we can retrieve those instances from the Views via the public properties defined in the locator class.
We can then register this locator as a global static resource in App.xaml so it is available for all pages to use. These resources are automatically instantiated, both at runtime and designtime, ensuring that both our sample and live data are ready.
Now change the code inside App.xaml to following:
<Application
    x:Class="Win10MVVMLightDemo.App"    xmlns="http://schemas.microsoft.com/winfx/2006/xaml/presentation"    xmlns:x="http://schemas.microsoft.com/winfx/2006/xaml"
    xmlns:local="using:Win10MVVMLightDemo"
    xmlns:vm="using:Win10MVVMLightDemo.ViewModels"
    RequestedTheme="Light">
    <Application.Resources>
        <vm:ViewModelLocator xmlns:vm="using:Win10MVVMLightDemo.ViewModels" x:Key="Locator" />
    </Application.Resources>
</Application>
Now we will Edit the StartPage.xaml to add the ViewModel to its appropriate page via the DataContext for this add following code to StartPage.xaml and set the DataContext to SartPageInstance that we defined in the ViewModelLocator.cs :
DataContext="{Binding SartPageInstance, Source={StaticResource Locator}}"
Also add the Xaml code inside the Grid View to display the title of the page that we defined as a property Title in the StartPageViewModel.cs
<TextBlock Name="Title" HorizontalAlignment="Center" VerticalAlignment="Center" Text="{Binding Title}" FontFamily="Segoe UI Historic" />
After adding these codes the StartPage.xaml will look something like this:
<Page
    x:Class="Win10MVVMLightDemo.Views.StartPage"
    xmlns="http://schemas.microsoft.com/winfx/2006/xaml/presentation"
    xmlns:x="http://schemas.microsoft.com/winfx/2006/xaml"
    xmlns:local="using:Win10MVVMLightDemo.Views"
    xmlns:d="http://schemas.microsoft.com/expression/blend/2008"
    xmlns:mc="http://schemas.openxmlformats.org/markup-compatibility/2006"
    DataContext="{Binding StartPageInstance, Source={StaticResource Locator}}"
    mc:Ignorable="d">

    <Grid Background="{ThemeResource ApplicationPageBackgroundThemeBrush}">
        <TextBlock Name="Title"  HorizontalAlignment="Center" VerticalAlignment="Center" Text="{Binding Title}" FontFamily="Segoe UI Historic" />
    </Grid>
</Page>
Now the App is ready to Build and Run, You may now build the app and check for errors. if error is found make sure you have not left out any of the previous steps
If there are no Errors found on building the solution you may now hit the Play button. You may choose to run you app in Local Machine, Simulator,or any of the Emulators. For now lets choose the local Machine and Run the App.
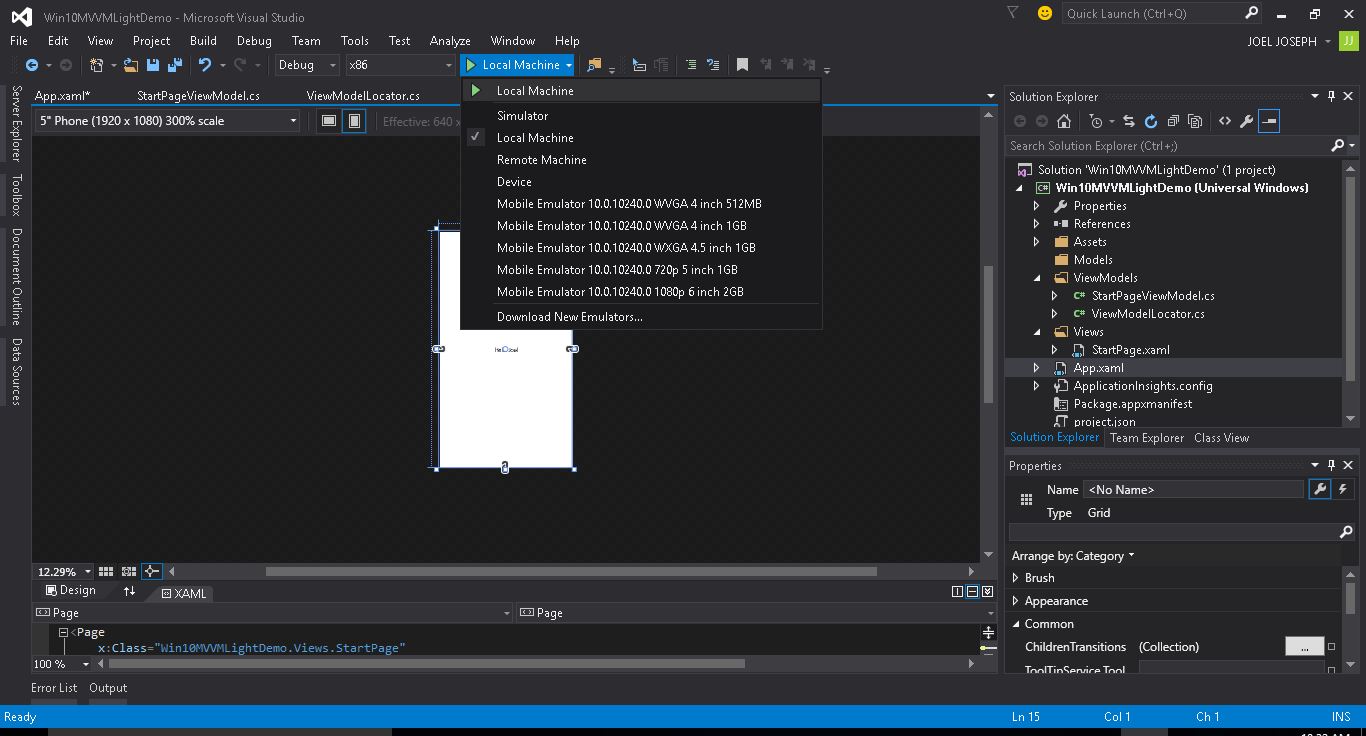
Upon running the app in debug Mode in Local Machine the App will look Something like this:
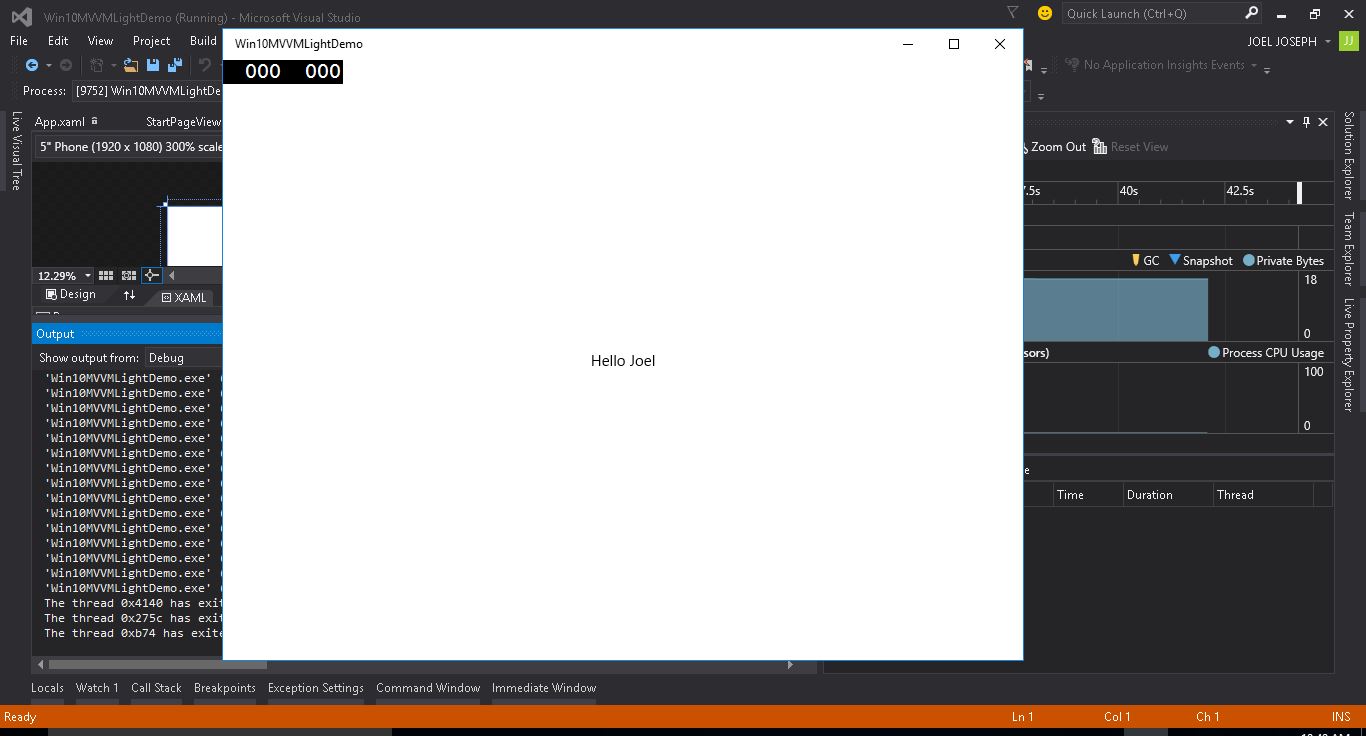
That's it the App runs, if you find the frame counter in the app annoying you can remove it by commenting out the following code inside OnLaunched method in App.xaml.cs
#if DEBUG
  if (System.Diagnostics.Debugger.IsAttached)
  {
    this.DebugSettings.EnableFrameRateCounter = true;
  }
#endif